Sunday, November 23, 2014

Sunday Sentiment ~ "The Best Way to Know God is to Love Many Things" ~ Vincent Van Gogh

A detail from my art journal

Today I'm linking up with Zsuzsa Karoly-Smith, artist and blogger at Inky Dinky Doodle. She hosts a link party called Sunday Sentiments, which is now open monthly rather than weekly.

Full Layout - "To Love Many Things"

These days most of my creative energy is geared towards my art journals. I continue collaging my stash of scraps, which include many sentiments. I love quotes and sometimes saccharine sweet vintage poetry as well. When working on this eclectic layout. I found this quote by Vincent Van Gogh:

The best way to know God is to love many things. 


I knew this familiar quote, but it took on new meaning as I glued down the odd assortment of treasures...at least treasures to me. Packaging from Burt's Bee's Pomegranate Lip Balm framed by paper beads I tightly rolled from recycled magazines...tattered vintage stamps from an old stamp album found in the corner of a flea market...tags from clothing and even my tea bag reminding me to "be yourself." :)

Cute drawing by illustrator of Suzy's Zoo - part of old bulletin board border when I taught daycare.

Recycled Paper Beads smashed flat add raised texture.

I love all these things not only because they inspire me creatively, but they remind me of happy memories or old friends. A writing theme emerged as I put items together in this jigsaw puzzle. I would sometimes blindly grab something from the two or three scrap boxes beside me, and it would end up perfectly fitting this theme.

Part of clothing tag suggests handwriting. A paper bead cut to a point makes a colorful pen. 


The elements began to remind me of two friends I know, both named Abigail. One is a fun-loving mother who writes adventures about cicadas, and one is a teenager with fresh hopes and stars in her eyes. Both are dedicated to their writing craft. Both have potential to change the world and each of them have boundless, God-given creativity. They have each deposited joy in my life, just as their name suggests


Take a breath and write.....


For dreamers and poets

In my last chat with the starry-eyed Abigail, she ended with: "I'm thankful for you." Of course this got me misty-eyed. I don't get to see either Abigail very often, but I am thankful for each of them. I told Abby:

When I count my blessings, I count you twice.
Everyone have a wonderful Thanksgiving. Please check back later today for news about a charity art auction I'm holding this week to raise money for orphans and widows in Uganda. They are in need of emergency food and cooking fuel this holiday season.

You can learn more about the Fundraiser here. I will be cross-posting information about the auction on both blogs, or you can "Like" the charity on Facebook at Truth of Wings.

Bye for now!
Sock Monkey says Hi and Goodbye

Sandra Lee

Linking Up:
Sunday Sentiments ~ November @ Inky Dinky Doodle

Thursday, November 13, 2014

A Leaf from my Art Journal ~ Early Light and Emergence

"Simple, Beautiful Ideas"
Today I uploaded a YouTube video of my altered art journal which you can view here. I created this journal last month from an old Chris Madden decorating manual. It was one of those types of books that is heavy on the writing but there were very few colored photos. Even though some of the decorating advice is outdated, I hung onto the book because it was such a nice size for a small art journal. Lately, I've enjoyed working in the square format in several altered art journals, including my pictures for the 100 Face Challenge (see my latest blog entry). The small space is less intimidating, and I find myself working very quickly through the pages. I filled half my art journal up in a couple days. 

In the past two weeks, I continue working on blank pages and adding details to others I've already done. I try not to concern myself about making a page "finished", but simply do as much as I want to for a little while, working on multiple pages at a time. 

I love this Star Fruit Stamp
To create the art journal, I took out several pages to reduce bulk using a utility knife. The remaining pages were doubled up using Mod Podge. This created thicker pages. Many pages were also sealed with Mod Podge for the first layer. Some were gessoed as well.

"Early Light" is an inspirational layout exploring color and meditating on God
I've been cutting out many grids lately, influenced by Daisy Yellow's Grid collage. I blogged about this process here. I also cut out images that captured a certain feeling and played with color combinations. The "Early Light" layout, for instance, captures that dreamy feel of sunrise, when you are first waking up and things feel fresh. I even loved using things like the "renew" tag from my morning ginger tea.

This sentimental quote is by Patience Strong from a vintage Ideals magazine
I was able to express visually what is hard to put into words as well. "Early Light" touches on things of the Spirit, but also memories of my late mom. I know I bring her up often on my blog, probably because art touches those deep places of our hearts, including memories of loved ones and even pockets of grief. 

D for Doris, my late mother
I picked up little scraps from my art table when putting this together, including this scrap of alphabet washi tape with the letter D. I put this in the garden with peaceful statue. The words peeking through speak of an "abundance of pillows" (a sign of rest) and this line:

Serene ~ The serene woman likes to spend time quietly enjoying her surroundings. 

Crochet Lace and other bits fill this "mood board"
Another page dealt with some of these themes of loss. "Emergence" is a busy hodge podge of elements. I struggled to find ways to unify them, and ended up using a lot of repetition. It still feels very full, crowded and busy, but this actually reflected my mood at the time. I was full of bottled up thoughts and emotions.
Emergence ~ A Key Word for This Season of Life
 My mom Doris was a crafter and artist in her own right. She saw beauty even in common things, and tried to find ways to use them. Like a magpie, she hoarded anything that sparkled or shined. I found these hearts in several envelopes in her craft stash after she died. They were cut from plastic packaging, potato chip bags, etc. She organized them by color with labels like "Orange Shiny Hearts for Fall Crafts", etc. I lay them on my lap and the hearts just spilled out of the packaging. And of course the tears rolled down because it felt like she was sending me a love letter even though she was gone, or hearts were sprinkling from heaven. 
Mom's Stash of Hearts
I kept these hearts for probably a year before I could feel emotionally ready to actually craft with them. I knew I wanted to use some in this autumn journal, though. I used my hot glue gun to adhere them to the art journal page. I knew the hot glue would react to the plastic, which it did. The hot glue caused the packaging to crinkle and even shrink slightly. But I used the texture to my advantage. When I run my finger across these hearts, they make a nice crinkly sound. I outlined the hearts with black paint and made white dots and scallops with a white fluid correction pen.

Chipboard Star from Happy Mail
This funny-faced creature was something from my own stash. I made her from different arty papers. Originally I had cut her hair to represent leaves or grass, but somehow they morphed into hair. When she finally found a home in this art journal spread, I realized this funky lady was actually a self portrait of me when I get out of bed in the morning. This is exactly how I look and feel. 
Yawn....time to wake up
This page was originally discussing pillows, so I added to this theme with pillows and a purple flower bedspread cut from origami paper (another happy mail treasure).

Stay in bed or change the world? Hmmmm......
Again, though, the dark colors spoke of emerging from a dark place of grief as well. Or perhaps from my tendency to hide myself away. The bed also reminded me of my years as a caregiver for my mom. One of my tasks was to be sure she had enough pillows to prop herself up in bed. 

When I revisited the page, I added the word Change. The cramped nature of the composition reminds me of a tight cocoon, or a mind busy with crowded thoughts. I know it's time in my life to emerge, change and ultimately grow. 

Time to Change
If you've read this far, I thank you for taking the time to hear the stories behind the images. I will continue to experiment with collage because the act of bringing together disparate things - things that do not seem to belong together - can sometimes create a unifying theme or idea or tell a story...even one deeply hidden that needs to see the light of day. 

So my friends, remember to allow room for emergence and change in your lives as well. 

Blessings,
Sandra Lee


Wednesday, November 5, 2014

Grid Love Art Journal Spreads ~ Inspired by Daisy Yellow


Back in August, I watched some inspiring tutorials by Tammy over at Daisy Yellow to jumpstart my art journal. She showed how to make a journal layout very quickly using a grid format. While I tucked away this idea for a while, now that I'm finally doing my own grid experiments, I'm finding it to be a game changer in how I approach my art journal spreads.

I've always clipped images from magazines, but the idea of using a few tiny squares caused me to rethink the value of certain images. For instance, I might throw away a clothing catalog if I don't care for the styles. But a pattern or color might catch my eye. The same goes for home decor catalogs as well. Now I can cut a swatch of fabric or clip a little object that might not be significant on its own, but in a layout can add just the right touch of texture or interest.

It's also a good way to use up those little bits of ephemera I receive from day to day....a stamp, a word or image from junk mail, or just using those leftover bits on my art table.

Here are a few closeups of my latest grid experiment I completed during an all night art party. ;) I began with some paper weaving using trimmings of leftover scrap paper.

This is similar to what it looked like before (I made a couple paper weavings):

Paper Weaving ~ Don't throw those scraps away! 
This was the first element I glued down, providing a jumping off point for the rest of the grid collage. I loved the eclectic mix of patterns and colors.
Paper Weaving after ~ Covered in Gelly Roll Doodles
Midways through, I started adding paper X's to go with the red O shape. Repetition always helps tie a piece together.
XOXO
One of my favorite squares is the Sakura Cray-Pas wrapper. This wrapper is from a very old set of oil pastels...probably one of my first sets I received as a teenager. It already had this lovely red color saturated into the yellow wrapper, created by oil pastels that rolled around in the box and "melted" over the years.
Detailed Closeup
I find that the grid experiments help to loosen me up and not take my art journaling so seriously. I realize every page doesn't have to be a laborious process. It can be quick and fun, like a little sketch of ideas. I can feel free to play with design and color without overthinking it. I find a side benefit to the grid collages is my eye is improving for capturing photos as well. This exercise forces you to isolate tiny little details and understand what is the most essential part of a picture. 

I don't drink Starbucks that often, but I thought I'd give a nod to Tammy with this little Starbucks ad. Thank you, Tammy, for helping me rekindle my love for art journaling. May God continue to give you a "green thumb" for creativity and teaching others to flourish in their own art.
The flower pot started looking like a coffee cup in the wee hours..so I drew in some coffee over the dirt. ;) 
You can check out Tammy's grid collage tutorial here.

Happy Creating~
Sandra Lee

Wednesday, October 29, 2014

Gardening Life File Folder Journal

On Tuesday, I spent a glorious October afternoon filming a few of my latest projects. I can't believe October is almost gone. It is by far my favorite time of the year to photograph. Everything is bathed in a rich, golden light.

Inspired by the golden colors of those fading October afternoons, I created a handmade journal from an old green hanging file folder. 

Gardening File Folder Journal
I cut the metal bars from the top and set them aside. With a couple folds, I created a flap for my journal and a tuck spot. I lay the metal bar against the flap and tore the edge to give it a distressed look. I don't have any distress inks right now, but I plan to ink it up in the future.

To decorate, I turned to the huge collection of images I cut out the night before. As part of fall cleaning in my garage studio, I went through years of collected information on flowers, garden plans, and outdoor decorating. Since most of this information can be found on the Internet, I only kept articles that were memorable, or vintage garden plans that I would be hard pressed to find on the Web. The rest I cut up to use for art. Out of these scraps and clippings from seed catalogs, this little file folder journal was born. 

Magazine Clippings - Gardening Life File Folder Journal


On the front cover, I decoupaged magazine clippings and a crackle paint chip. I found a cute phrase from an article that said "Come see the garden!" I glued a pretty yellow butterfly above it. The flap holds a set of keys which lay over this peek-a-boo message. 

Peek-a-boo!

I wanted the file folder journal to serve several purposes. It had to be a place to journal about gardening, whether planning a dream garden in the winter or remembering past gardening experiences. I also wanted some graph paper where I could draw garden plans or add photos. I also added a signature of mixed media paper so I could do some sketching or maybe watercolors.

So for the second signature, I cut to size some graph paper and ledger paper. Since these were single sheets stacked rather than folded sheets, I had to figure out how to hold them together. I didn't want to use the gluing method to bind them, so instead I simply used a scrap of the mixed media paper and folded it in half to create a spine. This was sewn along with the papers right into the folder. 

I hot glued a kraft envelope to the back and added a small handmade notebook. I sewed it straight down the middle. It is also decorated with gardening images from magazines and seed catalogs. The cover was a beautiful calendar page that originally came from Lowe's when I was part of their gardening club a few years back. 

I am very pleased with how it turned out. I am also happy to share the video with you, in case you missed it. 

If you have any questions, let me know. 

Beautiful October Afternoon ~ Journal
Enjoy these golden afternoons while they last. :)

Friday, October 24, 2014

Junk Journal #1 ~ Common Threads


I'm pretty excited about my new junk journal. I've been carrying it around for days showing anyone who I think might be remotely interested...OK, well, everyone!


Will you look at my Junk Journal? ;) 
And of course, I made a video to share on my YouTube channel, which was a little more intimidating. Not to mention frustrating. I ran into technical problems with the audio and then a fire truck and ambulance in the background. So I added some music and sped up the video. Besides a few captions, I just let the journal speak for itself as I did with my face-to-face shares. Problem solved. Here's the video in case you missed it:


I wanted to share a few more details on how the junk journal was put together. I mentioned already in the video that I used Easy Twine Binding and reinforced the spine with gold duct tape. I used a combination of machine sewing and hot glue to create tuck spots, pockets, and just add a little visual interest. The sewing element is a big part of the inspiration behind title of my junk journal, "Common Threads."

One of my favorite things about this junk journal was finally finding a home for some vintage photos I had tucked away in a drawer. As a collage artist, I collect ephemera and have also started a collection of "found relatives." The photos in this junk journal range from the 40's through the 60's. When I created the layouts, I began to do a bit of storytelling in my mind. Isn't that what journaling and scrapbooking is all about?

Time Flies JJ layout with "Found Relatives" 

The spread above is one of my favorites in the book. There are a couple of faded photos of families and couples, but I really like the soldier and baby picture. Part of my story for those two is Daddy is off to war, but he always keeps his precious little baby girl close to his heart. She looks like she's gazing up at him in this layout.

The idea of "found relatives" also ties into the "Common Threads" theme in my junk journal. While I've never met any of these people personally, I am honoring their lives and existence in a creative way. We all share so many things in common: birth, marriage, family, war and peace. This journal, which eventually will contain some of my thoughts, stories and photos, is part of that common thread we share. Though I don't have children, hopefully someone will find this journal long after I'm gone and connect to the stories and photos within. At least that's my hope.

Here are a few more pictures from the junk journal. If you have any questions about techniques or materials used, please leave them in the comments section.


Another favorite page with Happy Mail treats. Thanks Kym Murphy for the purple butterfly tag. 

Plain yellow envelope decorated with cover of paper pack. The roses are very glittery. 

Victorian ladies and trim from Lynn L.

Thanks for looking!!!

Friday, October 10, 2014

File Folder Envelope Tutorial - Mail Art Challenge

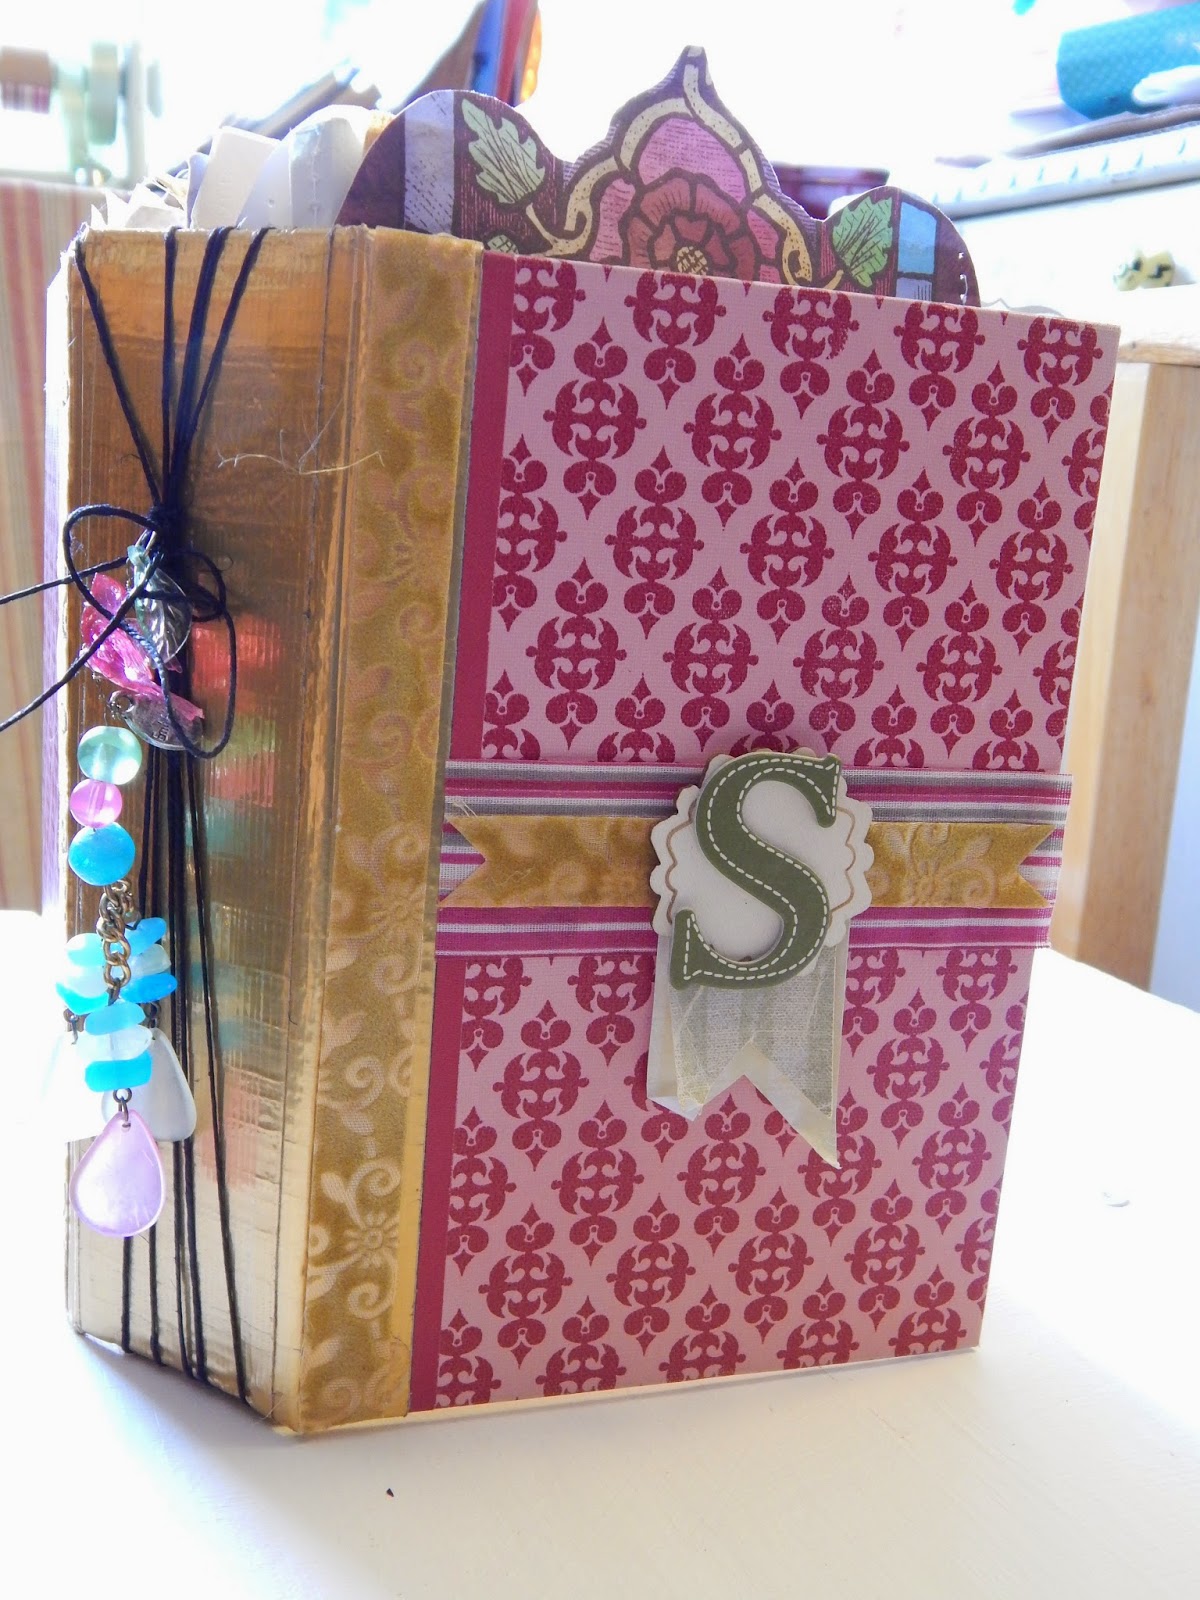
I had a request to share a tutorial on how I made this piece of mail art for a recent swap. Tiffany over at Southern Gals Designs on YouTube got some girls together who are mail art junkies to participate in this fun challenge. We had to create a decorated envie and incorporate text paper somewhere on the envelope. That was the only rule, other than filling it with at least three items for the recipient.

Here's what I came up with...

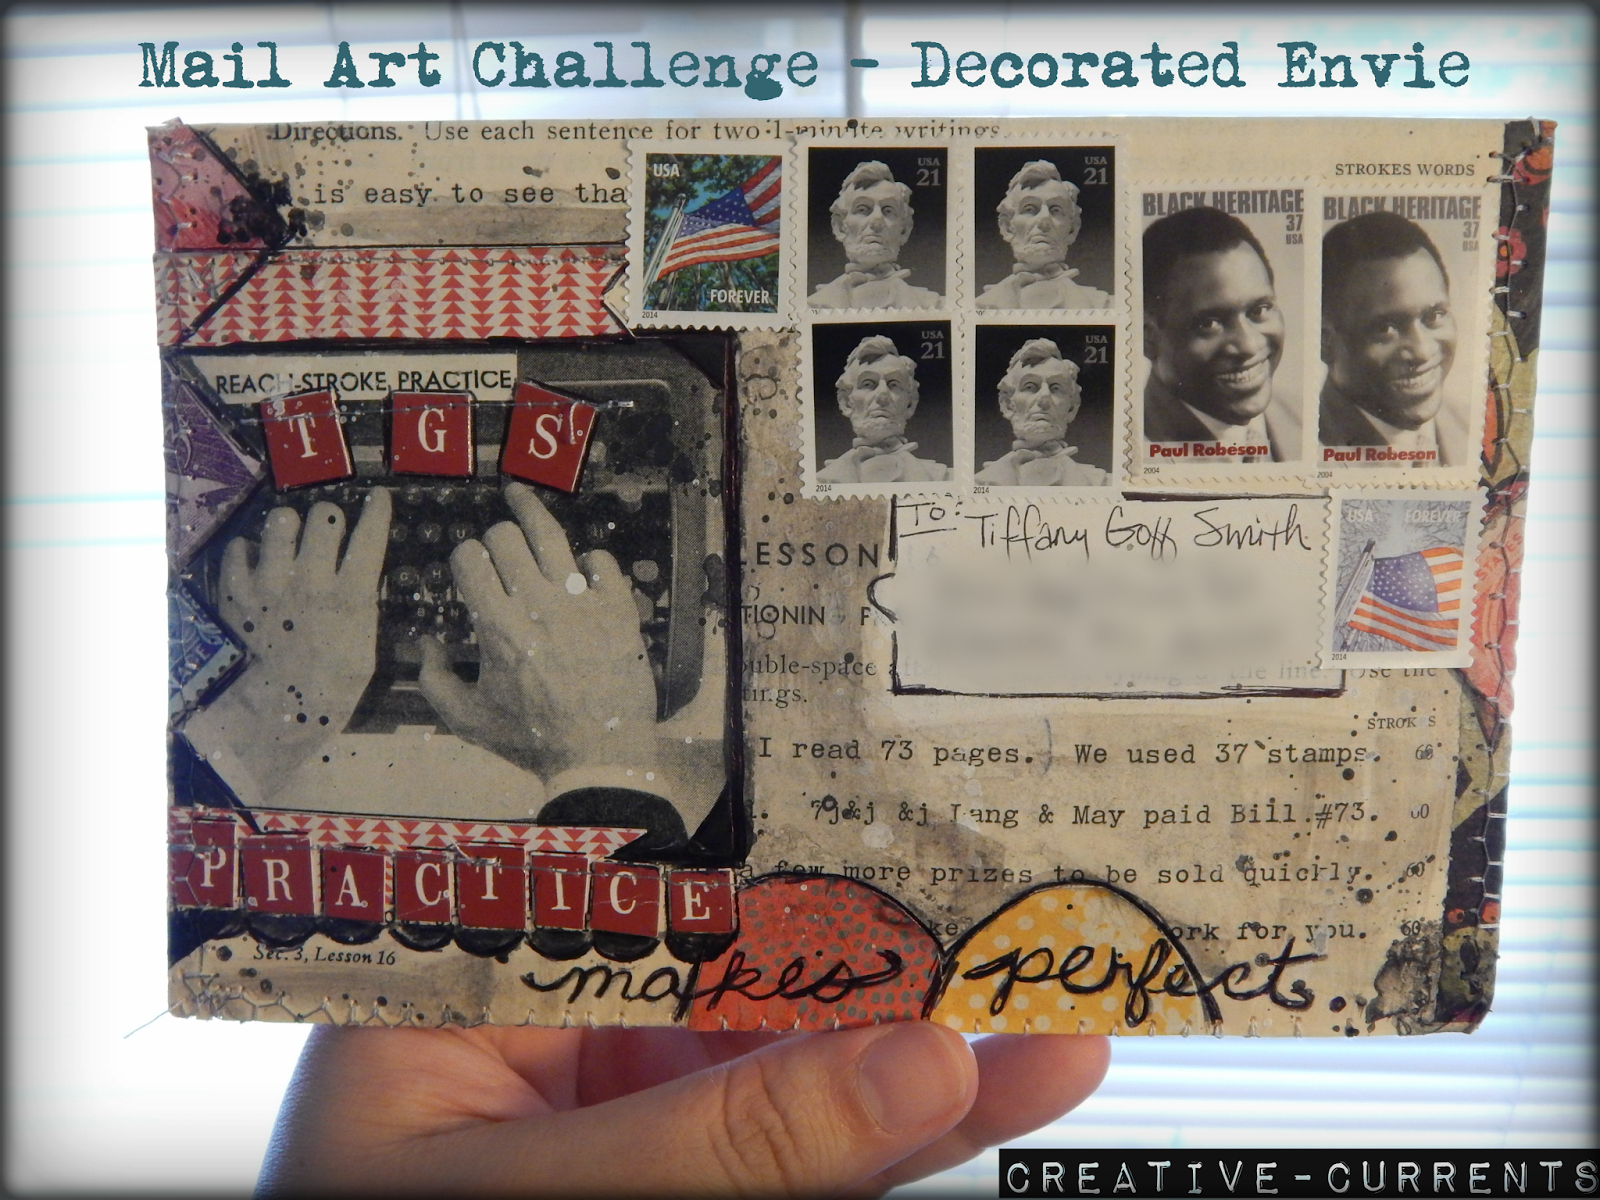
Finished File Folder Envelope ~ Mail Art Challenge
And here's the back:


I took pics along the way to show a bit of the process, but hadn't originally intended to make a full-blown tutorial. Since I didn't document everything fully, if anything is unclear, just pop me a question in the comments below.

Step One: Gather Materials


  • Text Paper
  • Scrapbook Paper
  • Embellishments/Images
  • Manila File Folder
  • Envelope Template (I used an old greeting card envelope)
  • Sewing Machine & Choice of Thread
  • Paint, Pens, etc. 


To fulfill the challenge to use text paper, I chose a couple sheets from this handy dandy vintage typewriting manual. I thought it was appropriate since so many of us mixed media artists love our typewriters and vintage ephemera. This one is from 1951, a treasure I found when helping an older gentleman clean out his storage shed. I got a sweet blue typewriter as well (I will show pics soon!).

Front Cover ~ 20th Century Typewriting Course

I just love the images and typewriting exercises!

Inside front cover 
On the inside front cover is a series of "finger gymnastics", designed to help you warm up. It's tough banging away on those keys! No. 6 looks a bit like a Vulcan peace sign.

I also found these jumbo postage stamp images on a piece of junk mail featuring vintage stamps from the 1950's. I thought it went well with the 1950's typewriting manual.

Who said junk mail can't be useful? Fodder for mail art!
I opened a large greeting card envelope and laid it flat. I traced it on a dog-eared manila folder that still had some life in it. You can also use a fancy envelope punch or Google some printable envelope templates to find the size and shape you like best.

Flattened manila folder envelope
OK, obviously the pic above is well into the process. I had already collaged everything and did the sewing. But you can get the gist of what the envie looked like before folding. This is the inside.

The next step was collaging the images and scrapbook paper to the envelope. I ran out of Mod Podge, so I used a homemade decoupage (roughly 50/50 Elmer's Glue and water). This part was tedious and a little messy. I had to be careful since I was dealing with delicate vintage paper. I kept the layers of glue thin by scraping over the top of each paper with a credit card. I used my hair dryer (heat gun) to quickly dry. I believe I also let it hang out a while and finish drying, but I can't remember for sure. Of course, the edges curled up a bit as you can see in the pics, but once I began scoring, folding, and sewing, I beat them into submission.

Front of file folder envelope in process
I like the smooth texture the homemade decoupage provides. I'm not sure the overall archival quality of it, but it works well when you are trying to save money. The various scrapbook papers were leftover bits from other projects. They were cut into scallops, pennants, etc. to add a little interest to the edges and flaps of the envelope.  I used one of the typewriting diagrams for the main focal point, and then glued Tiffany's initials to the top of the typewriter. I also cut out the letters to spell PRACTICE. {Thanks to Lynn Lassen for the alphabet letters!}

I used my sewing machine to sew along the edges. I used a fancy little embroidery stitch as well as straight stitching. It's all a little imperfect, but that adds to the charm. I also sewed along the top of the alphabet letters to add texture and to make sure those little guys stayed secure.

Everything was creased by hand and by using the back of a pair of scissor handles to keep the folds fairly crisp. Here is the envelope beginning to take shape. I enjoyed the way the vintage stamp images overlapped to create a flag or bunting effect.

File Folder Envelope Sewn
As you can see here, the envelope is nice and thick. I've added the little gifts inside. I used hot glue to glue the envelope back together. I will explain more about this in a minute.

Thick sturdy file folder envelope
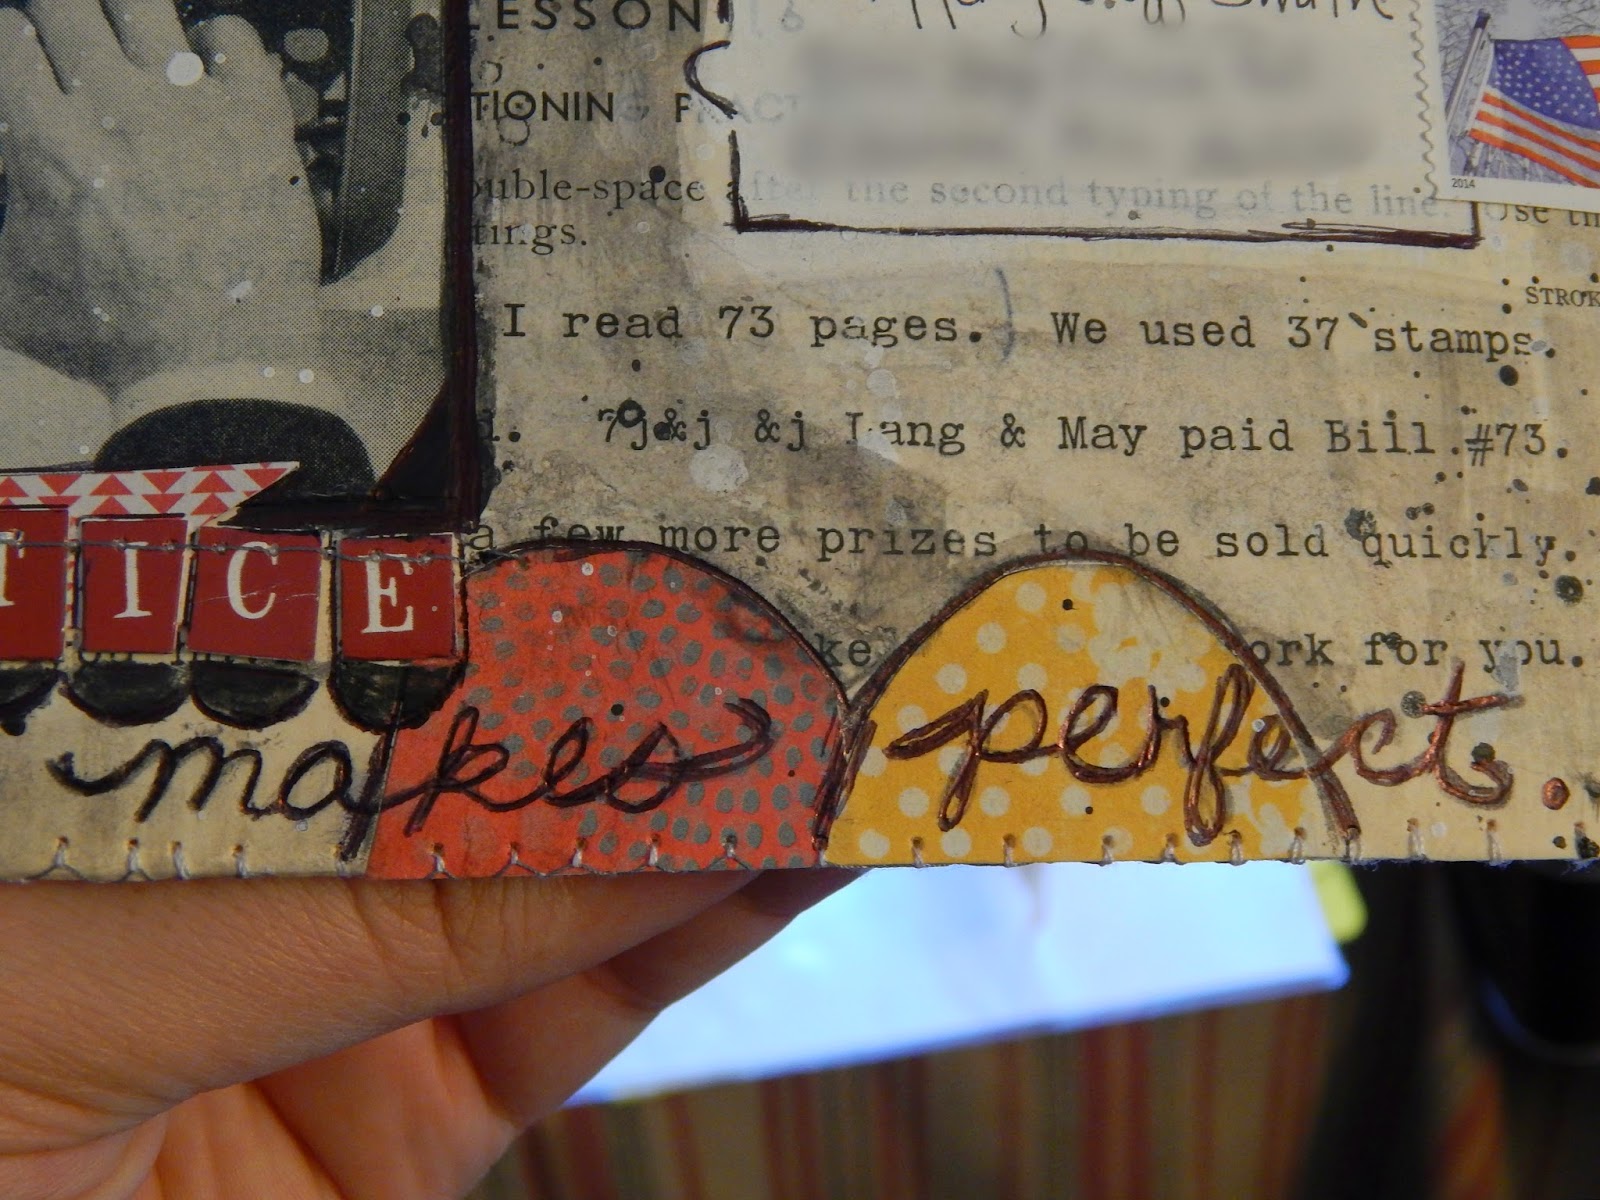
Practice Makes Perfect - True in Typing and ART!

Fun postage that kept true to the color palette of Black, White and Red
I added some details with thinned acrylic paint. This including grunging up the typewriter paper on the front and flicking some black and white paint splatters here and there. It reminded me of ink splats or little drops of White-Out Correction fluid. ;-)

I kept some plastic sheets that once contained punch-out labels to use as a stencil. I wanted to create a place to write the addresses on the front and back. I used the thin white paint to keep it semi-transparent. I did outlining with pens (regular ballpoint and micron, I believe) and also a dark sketching pencil.

Hot Glue Seals this Handmade Envelope

Once I was done, I was ready to close the final flap of the envelope. I was stumped at first, because I wanted to make sure Tiffany could still open the envelope, but since it was thick and bulky I knew the glue or tape had to be strong enough to hold it shut. Since my choices were limited, I decided to continue on with the hot glue.

I added a drop of glue in the top corners and another along the middle of the flap. I finished it off with a large circle of glue at the "V". That flap wasn't going anywhere! It reminded me a little bit of an old-fashioned wax-seal, but on the inside. I sent Tiff a message about how I sealed it. I told her to just take something sharp like a metal palette knife to scrape under the dabs of hot glue. It looked like it would open with minimal damage to the design.

Well, that's basically it. I am pleased with it and hope to make more envelopes like this. I still have tons of that yummy typewriter manual paper to use, and I have ideas for other envies that will help me use up some of my stash. The thickness and durability of the envelope makes it appealing. With an added layer of mod podge or other sealer, these could also make nice storage envelopes.

I wanted to add that I was also inspired by some delicious handmade envelopes by Yoliebean, which I watched before making mine. Here's the video that got my wheels turning when trying to figure out the substrate for my project. Her work is beautiful!

Never hesitate to ask any questions~~~
Sandra Lee

Tuesday, August 26, 2014

Art Drop Day ~ September 2, 2014


All artists, (that means students and professionals, painters and cartoonists, sculptors and illustrators, animators and fine artists, EVERYONE who creates) this September 2nd* is World Art Drop Day
Wherever you find yourself that day, drop a piece of your art and tell someone where to find it. The world needs this right now. We need to feel a little more connection to each other and there's nothing like the bond two random strangers can make through the act of creating and giving.
{Jake says} I recently just finished a cross-country art drop this summer and it was exhilarating. The emails and responses I received from the finders ran the gamut of funny to touching. I want that for everyone!
Here's how it works:
  • Draw a picture and hide it somewhere.
  • Take a photo of either the art or the hiding spot or a combination of both.
  • Post the image, the city you dropped it in, and a hint on any social media of your choice. Be sure to included the hashtag: #artdropday
  • Then move on, hoping someone finds it. OR hang around and meet your new friend.
That's it!
I need your help spreading the word on this. Reblog it, retweet it, facebook it, or even tell someone in person!
September 2nd, lets connect the whole planet with art!

*Reblogged from Mr. Jake Parker's website
Special thanks to June Crawford of A Creative Dream for sharing this on her blog